Authentication in Update Service
Update Service can be configured to use external login providers to provide authentication capacities to the tool.
Authentication Settings for Update Service
You can change the authentication settings by accessing Settings -> Edit Security Settings
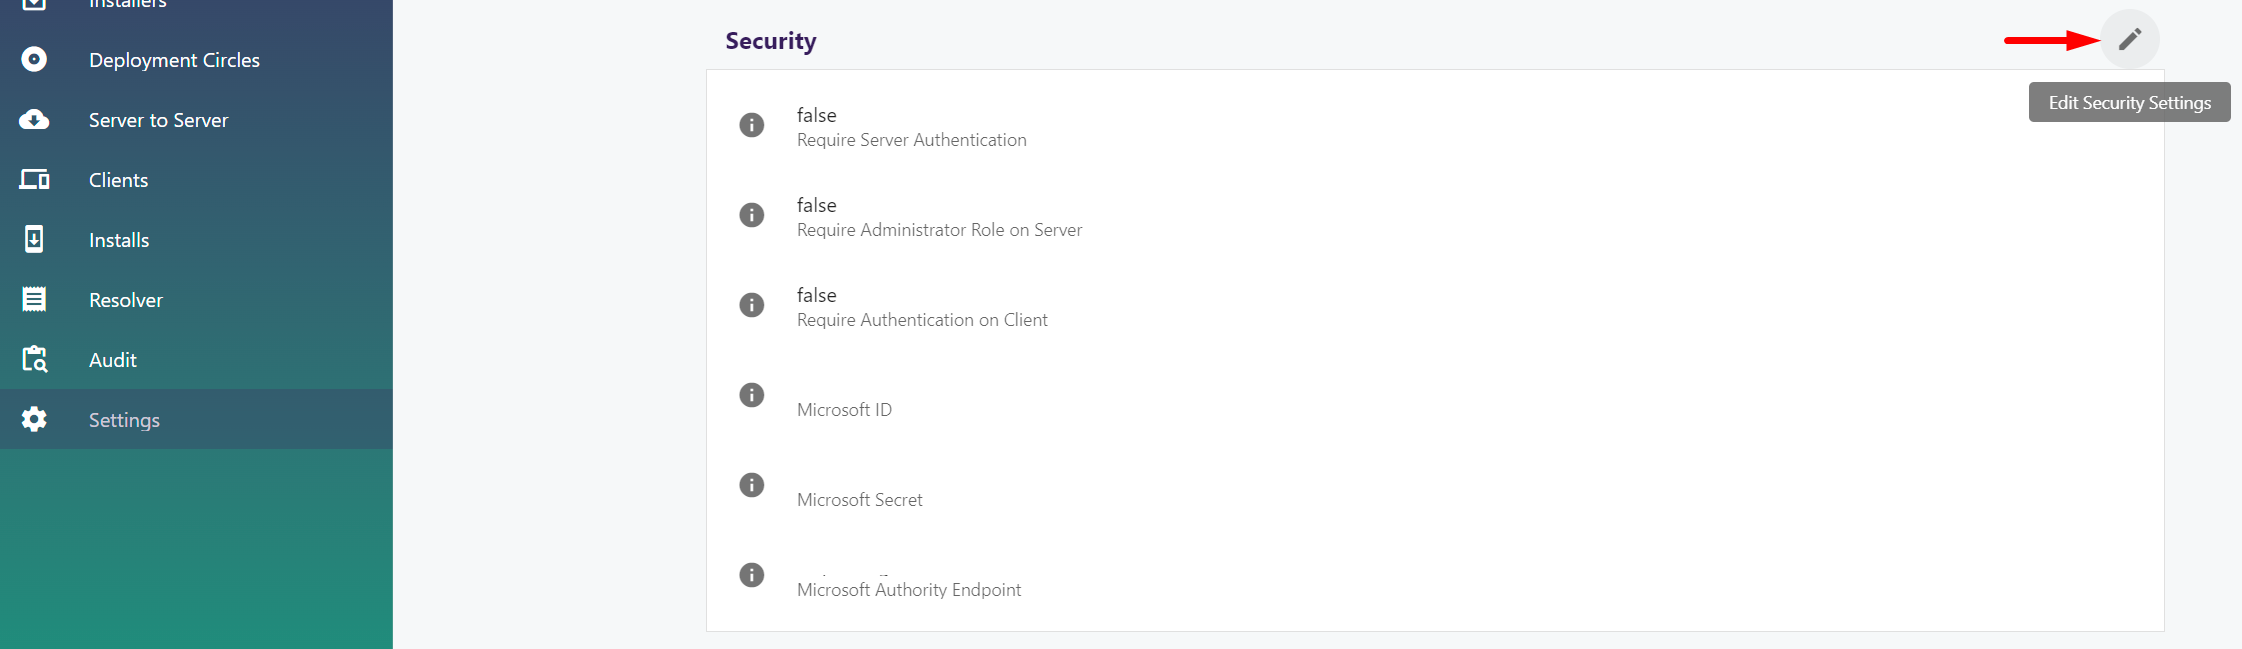
Accessing authentication settings
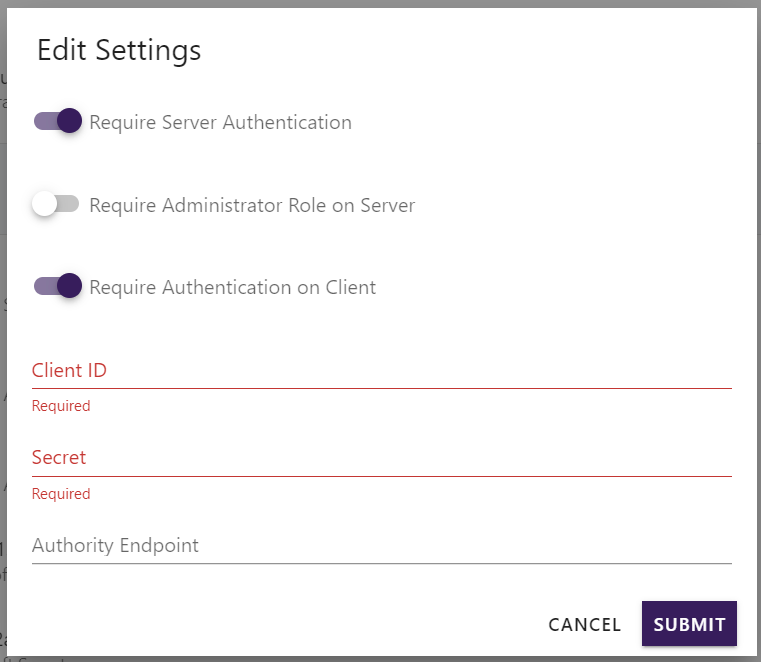
The following popup has some configuration flags to enable some authentication features:
- Require Server Authentication enables login while accessing the server web administration tool.
- Require Administrator Role on Server configures the application to lock down administration functions from normal users. Require Server Authentication must also be enabled for this to take effect.
- Require Authentication on Client is set to ask for login information from the client connecting to the current server.
To configure Update Service external authentication we need the following information:
- Client ID is Application ID so that the endpoint knows which application is being requested login to.
- Application ID so that the endpoint knows which application is requesting login to.
- Secret is Application Secret so that the provider knows the application is authorized to request a login.
- Authority Endpoint serves the purpose of verifying the user and securely accessing their information. The setting of this field depends on your desired login restrictions. You can choose to allow only specific organizations to log in or enable personal Microsoft accounts along with multiple organizations.
- Use this endpoint to support users from multiple organizations and/or personal Microsoft accounts:
- Use this endpoint to support users from specific organization or tenant, requiring users to sign in using their organizational accounts within that specific tenant:
or via the appsettings.json file:
...
"Settings": {
    "IdentityRequireAuthenticationOnServer":  "true",
    "IdentityRequireAdministratorRoleOnServer":  "False",
    "IdentityRequireAuthenticationOnClient":  "true",
    "IdentityMicrosoftClientId":  "<Client ID>",
    "IdentityMicrosoftSecret":  "<Application Secret>",
    "IdentityMicrosoftAuthorityEndpoint":  "<Authority Endpoint>"
}
...
Warning
To apply changes to the authentication settings fully, a server restart is necessary, followed by refreshing the site page. The method for restarting the server depends on the platform it is running on; in IIS or the Azure App Service.
Identity and Authentication Details
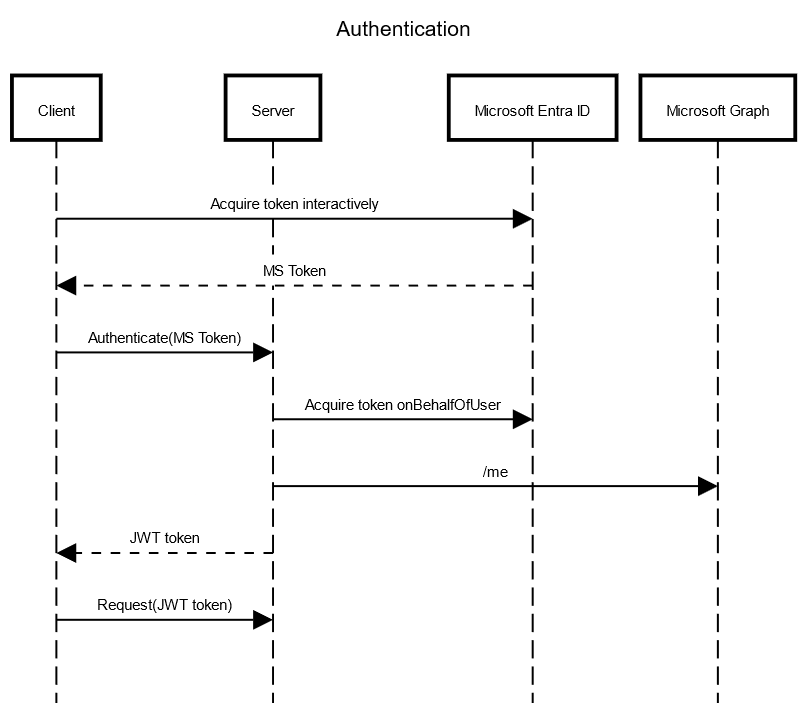
Both the server UI and client authentication use the OAuth 2.0 on-behalf-of authentication flow, to authenticate to the Microsoft Identity platform, using an Entra ID.
- The client (server UI, client app, or cmdlets), prompts the user for credentials interactively to obtain a token from Microsoft Entra ID. The type of credentials is determined by the application registration configured and the preferences of the organization it belongs to.
- Once a token is obtained from Microsoft Entra ID, the client sends this token to the server to request another token on behalf of the user.
- The server generates a new, short-lived JWT token and sends it back to the client.
- The client uses the JWT token to access protected API endpoints when it calls the web API.
Underneath, ASP.NET Core Identity is used for login functionality and to secure the web APIs. As well as Microsoft Authentication Library (MSAL) to provide the authentication flow between client, Microsoft Entra ID and server.
The server automatically creates users when they log in for the first time.
For unattented scenarios, to use with the cmdlets or client service, a personal access token (PAT) is required.
Administrator Role
If you enable the Require Administrator Role on Server setting, as well the Require Server Authentication, access to the server UI is limited to users with the administrator role. To assign this role to users, navigate to the user list, select a user, click the Grant Role to User button, and choose the Administrator role.
The user list can be found on the settings page of the server UI, under the Security section. It is visible only when Require Server Authentication is turned on. Additionally, the initial user who logs in to the server UI is automatically granted the administrator role.
Users can continue to use the clients to install and update packages.
Configuring Update Service for Azure AD Login
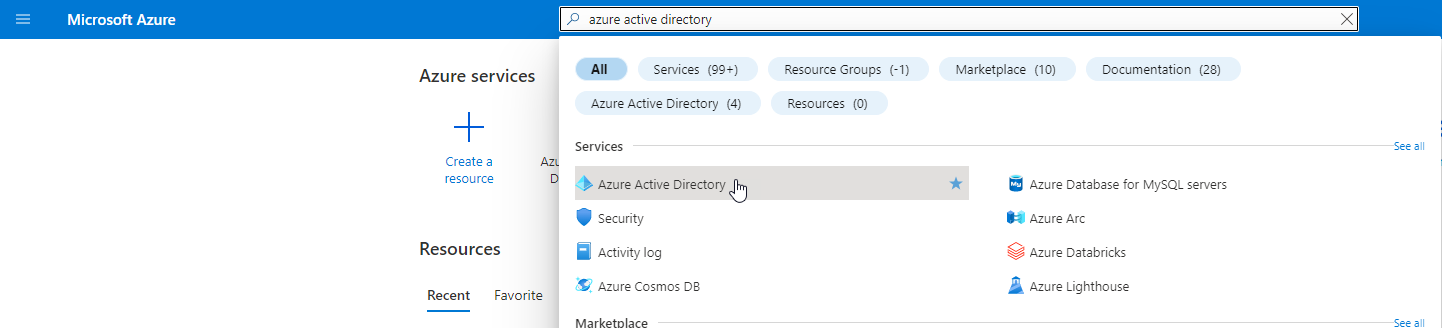
Step 1 - Access Azure Portal
Open the Azure Portal and navigate to the Azure Active Directory service.
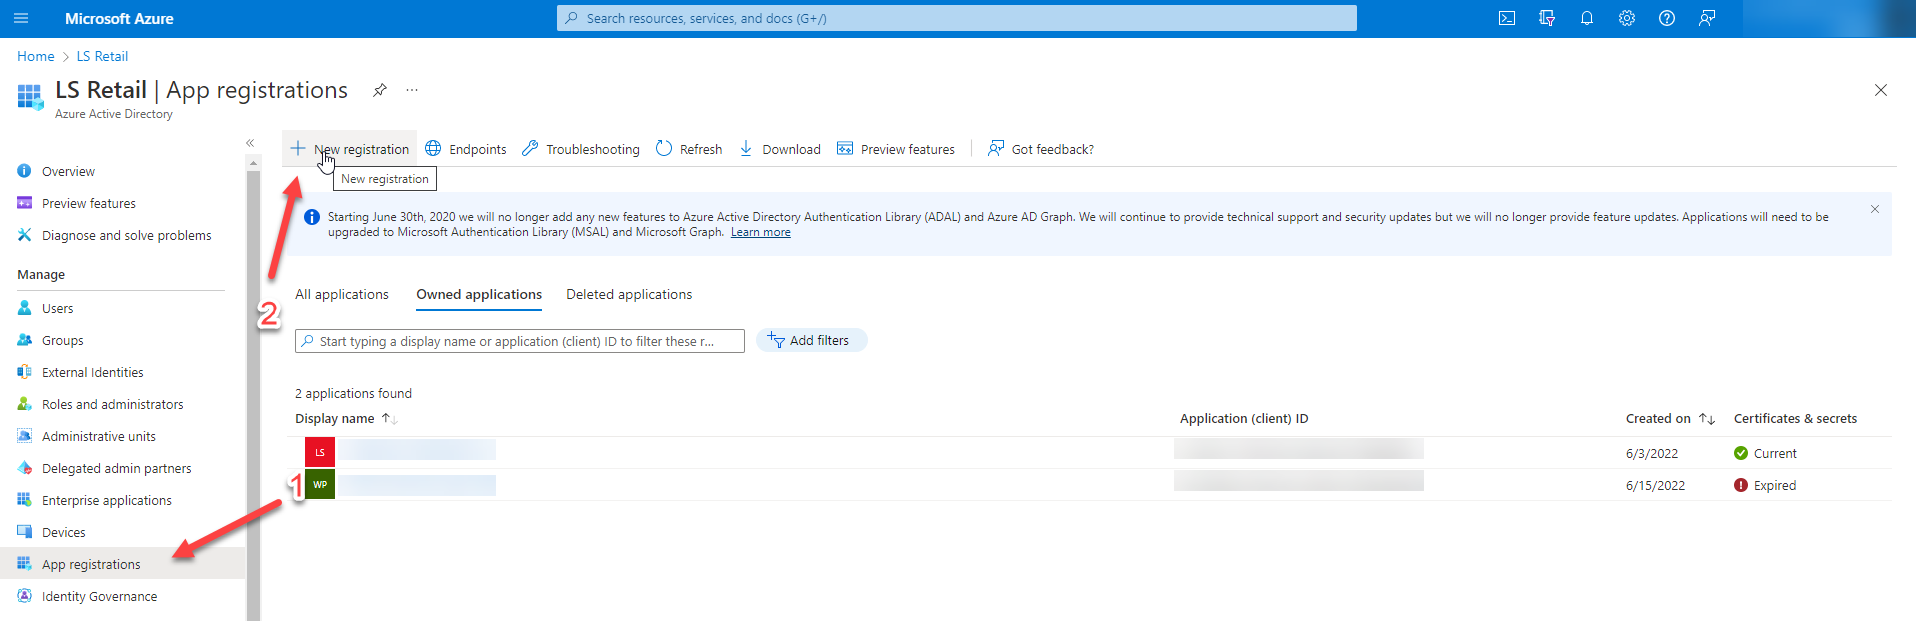
Step 2 - New Registration
From the sidebar menu, click on "App Registrations," and then select "New registration."
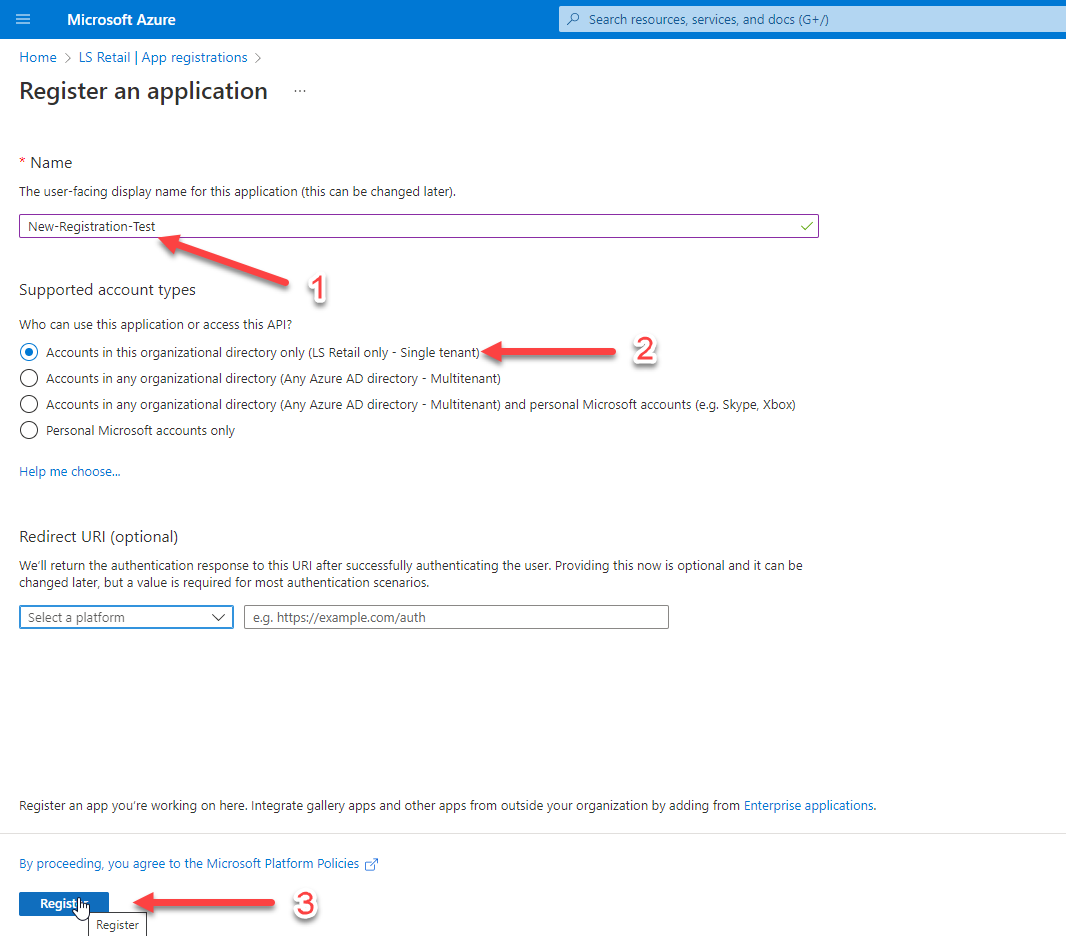
Step 3 - Registration Form
Fill out the registration form with your desired name for the registration, select "Single tenant," and then click on the "Register" button.
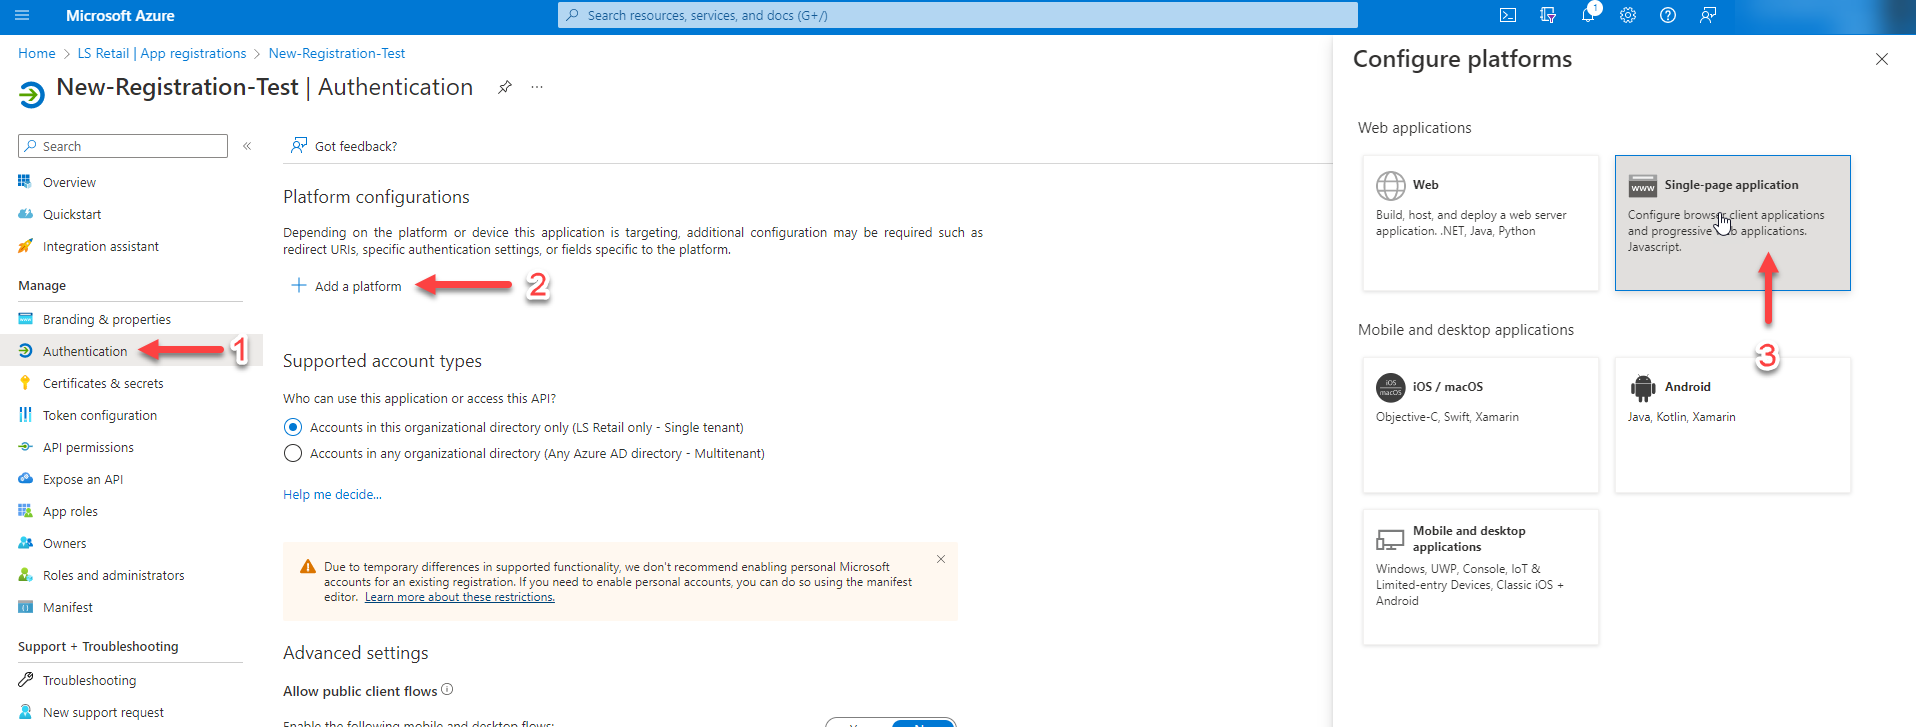
Step 4 - New Platform
From the sidebar menu, select "Authentication," click on "Add a platform," and then choose "Single-page application."
Step 5 - Login Url
In the login section, enter the URL for your application's login page, using the following format: https://[Your URL]/identity/login/microsoft. For example, if your URL is http://localhost:8080/user, your login URLs should be:
http://localhost:8080/user/identity/login/microsoft
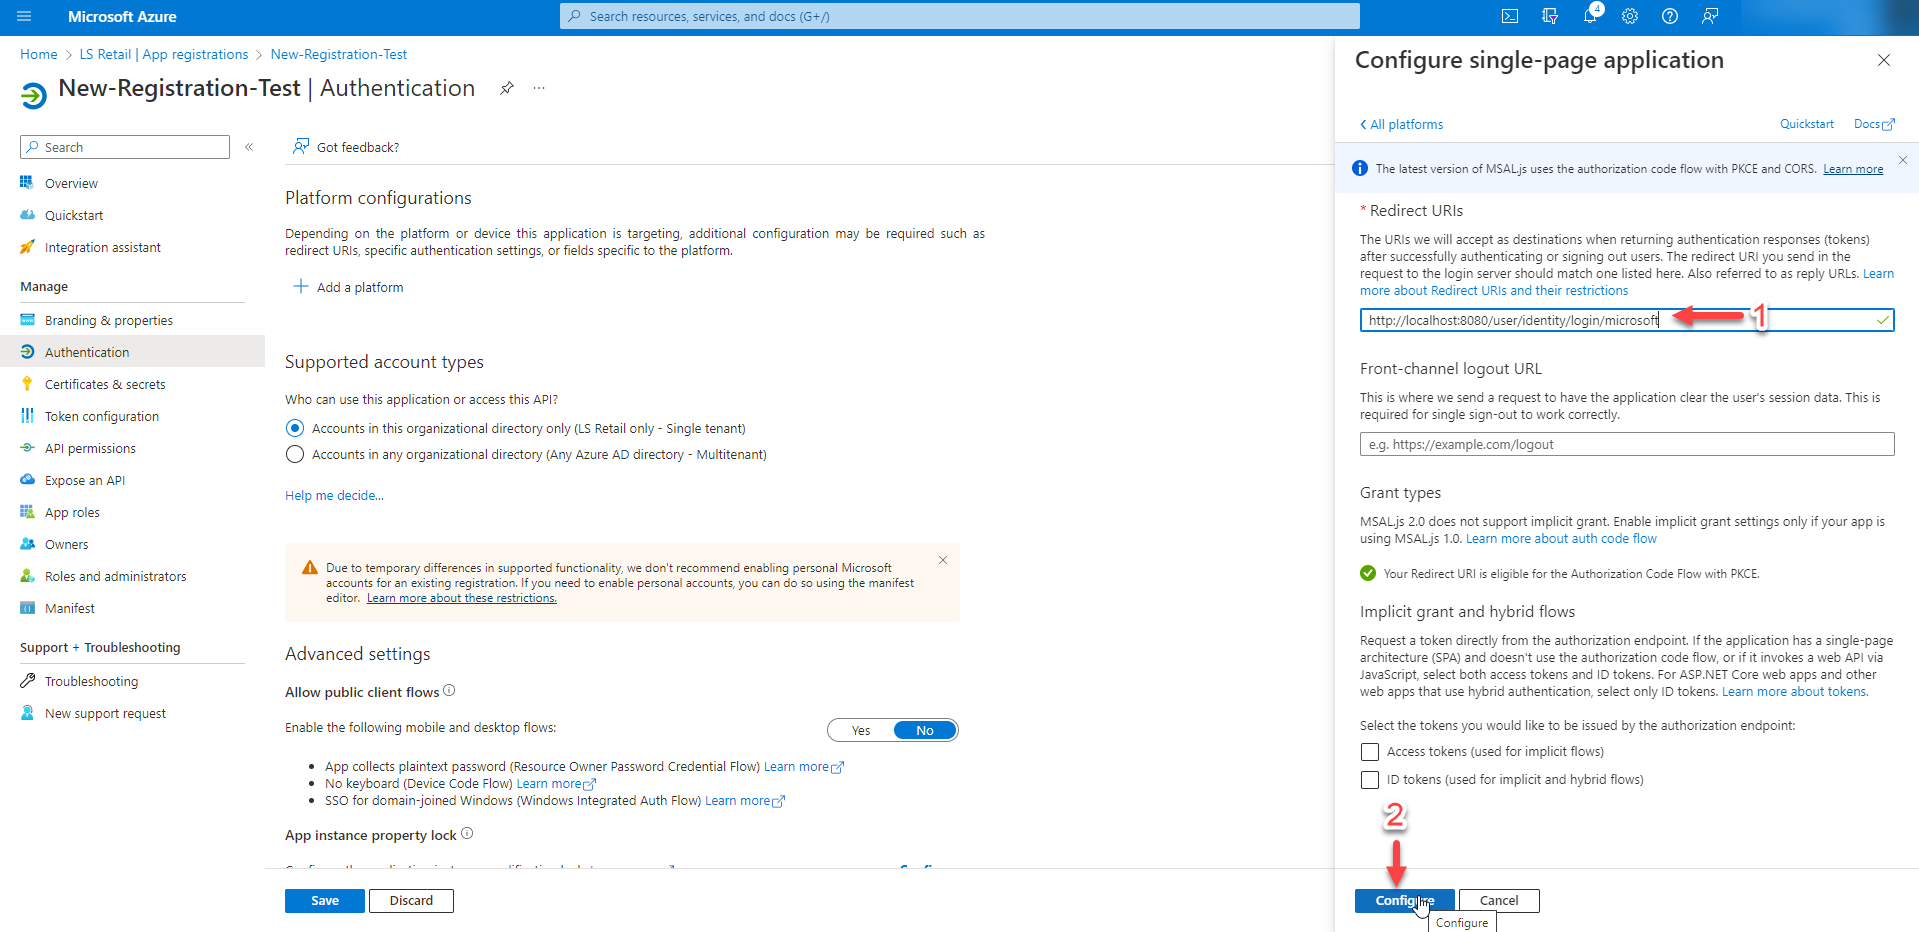
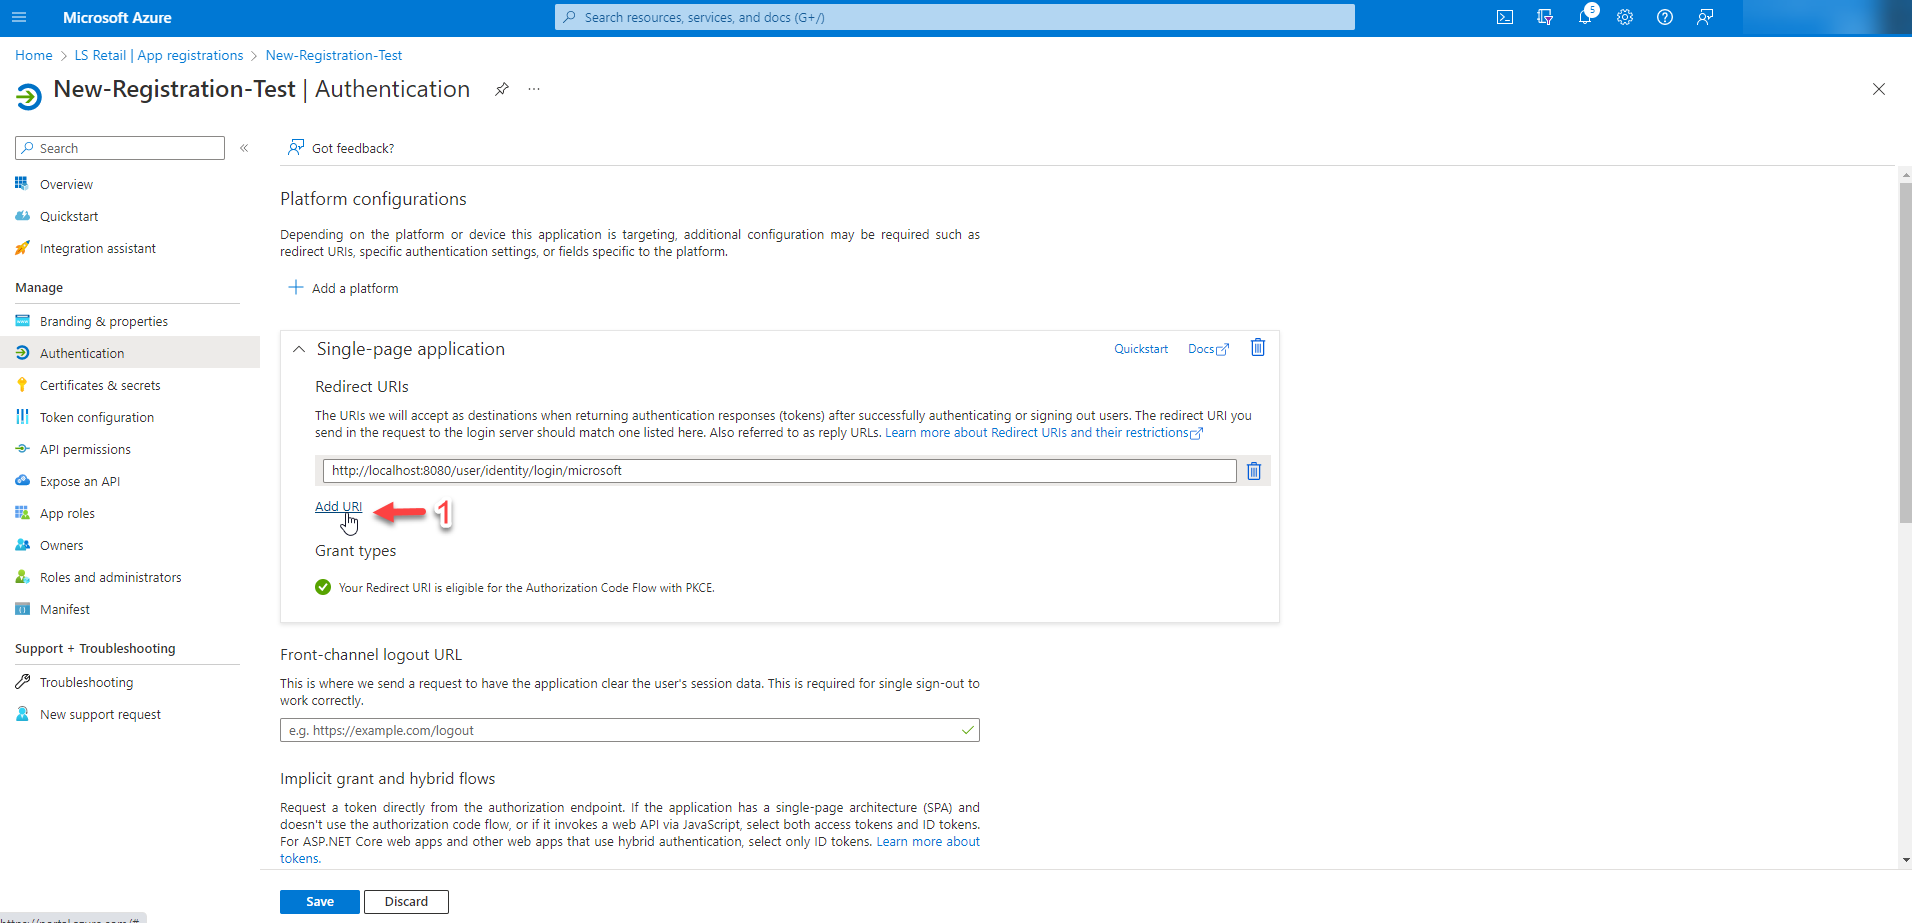
If you need to add more URIs, click on the "Add URI" button below the login URL field and enter the additional URIs in the text box that appears. Separate multiple URIs with a new line.
Step 6 - Second Platform
To add a second platform, click on the "New platform" button, and then select "Mobile and desktop applications."

Step 7 - Configure the desktop application
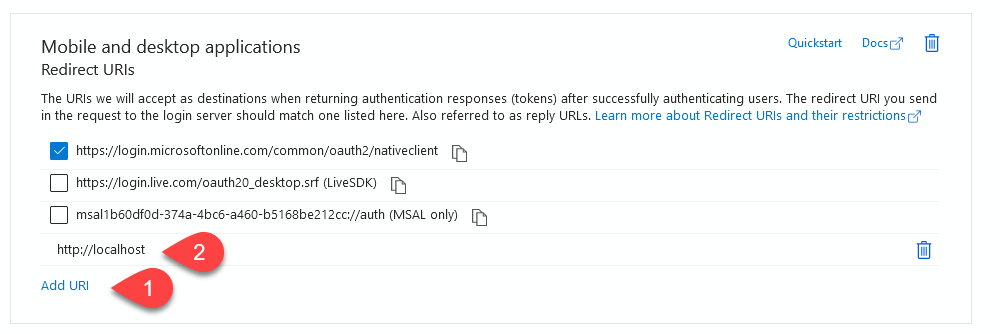
Check the box next to https://login.microsoftonline.com/common/oauth2/nativeclient, and then click on the "Configure" button.
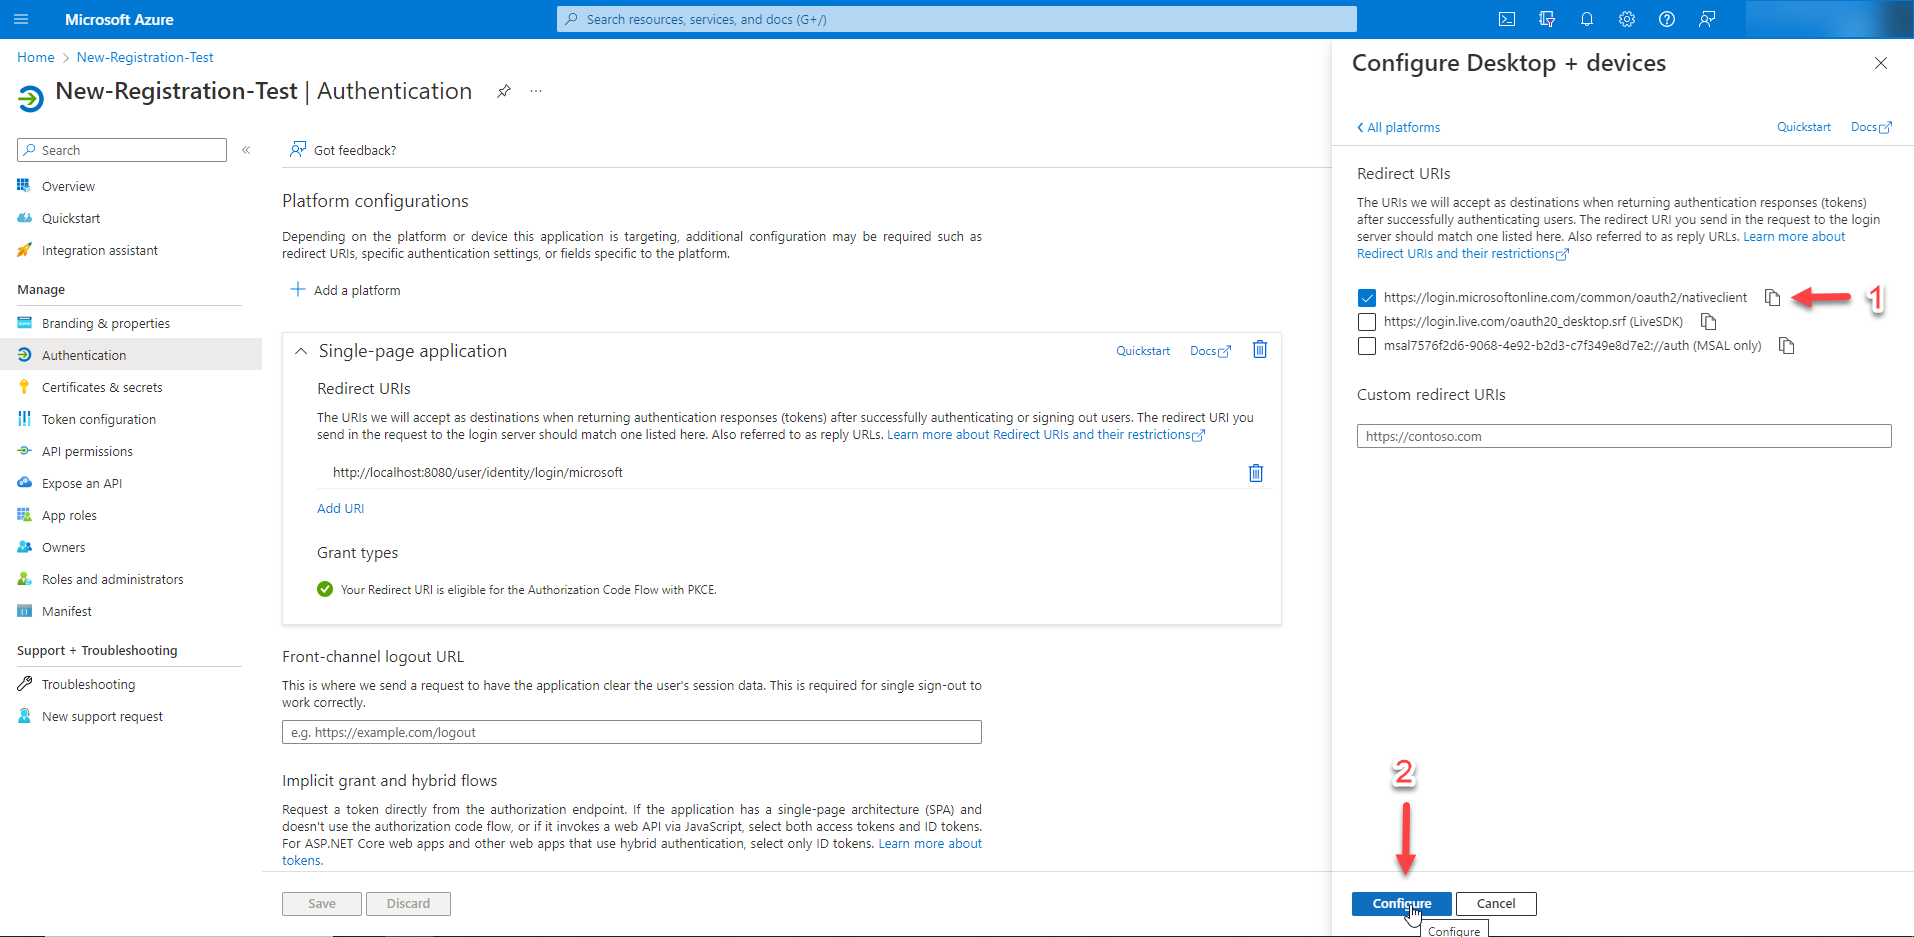
Also, include http://localhost in the redirect URIs.
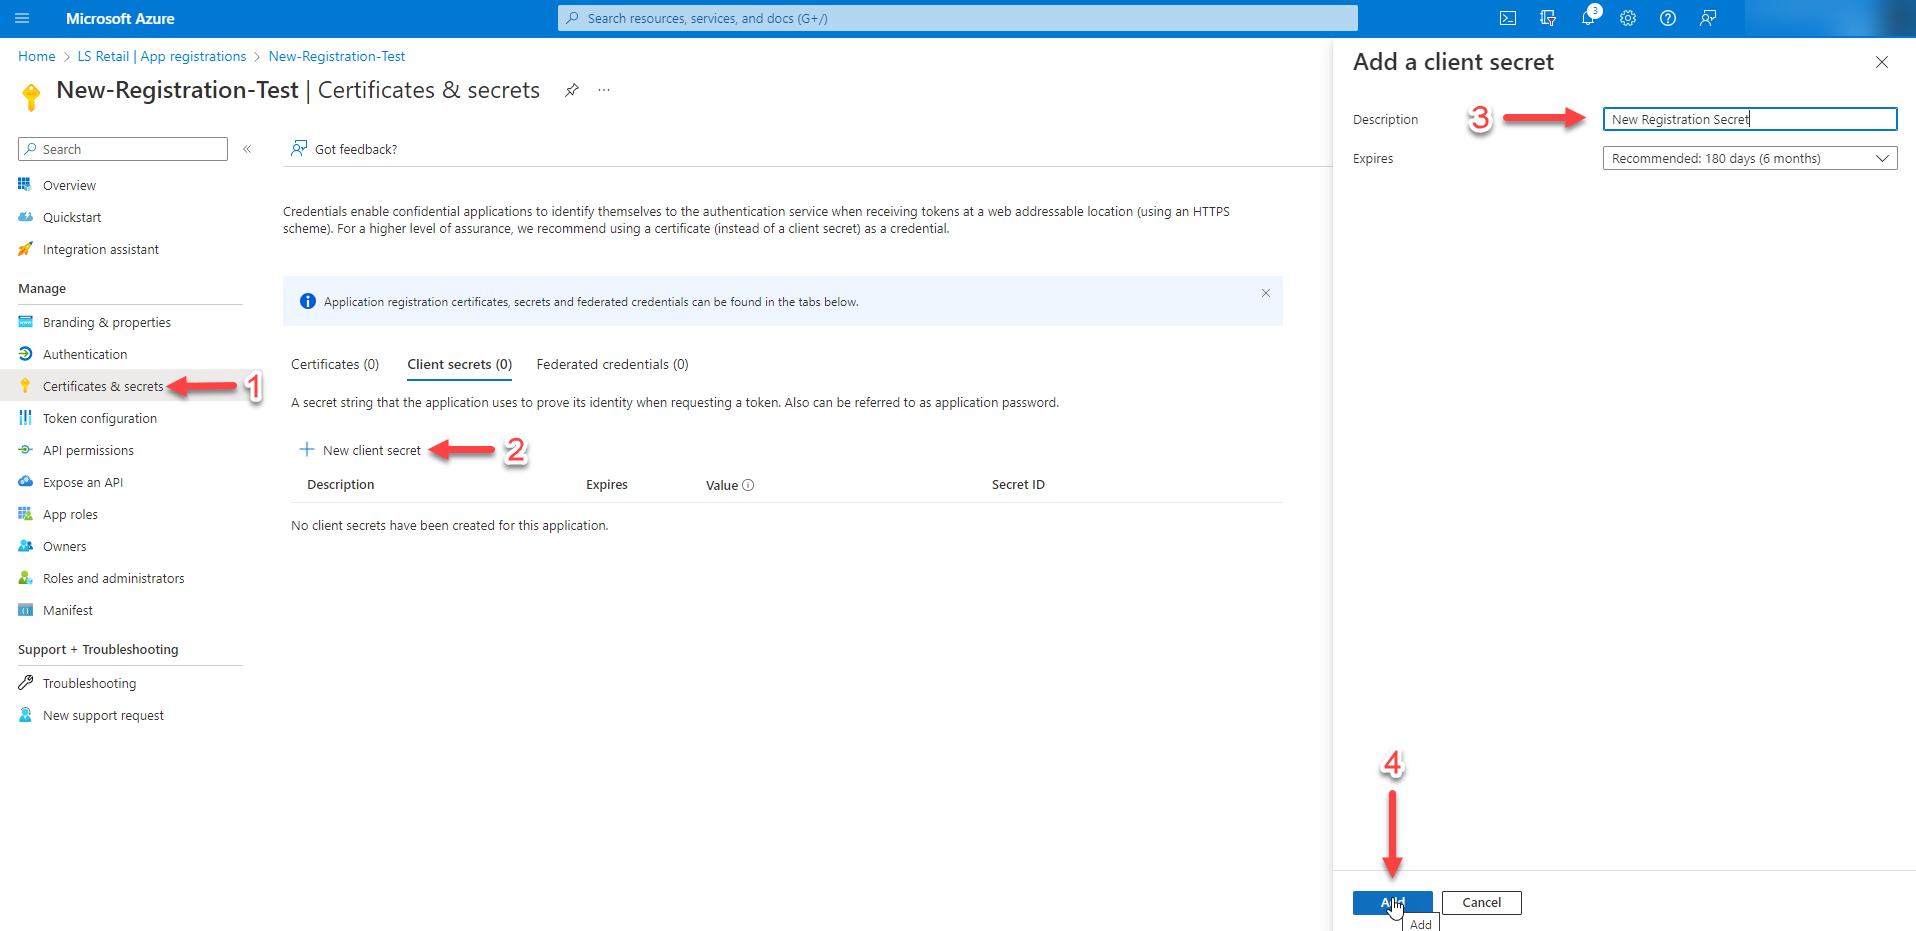
Step 8 - New secret
From the sidebar menu, go to "Certificates & Secrets." Under the "Client secrets" section, click on the "New client secret" button, enter a description for the secret, and then click on the "Add" button.
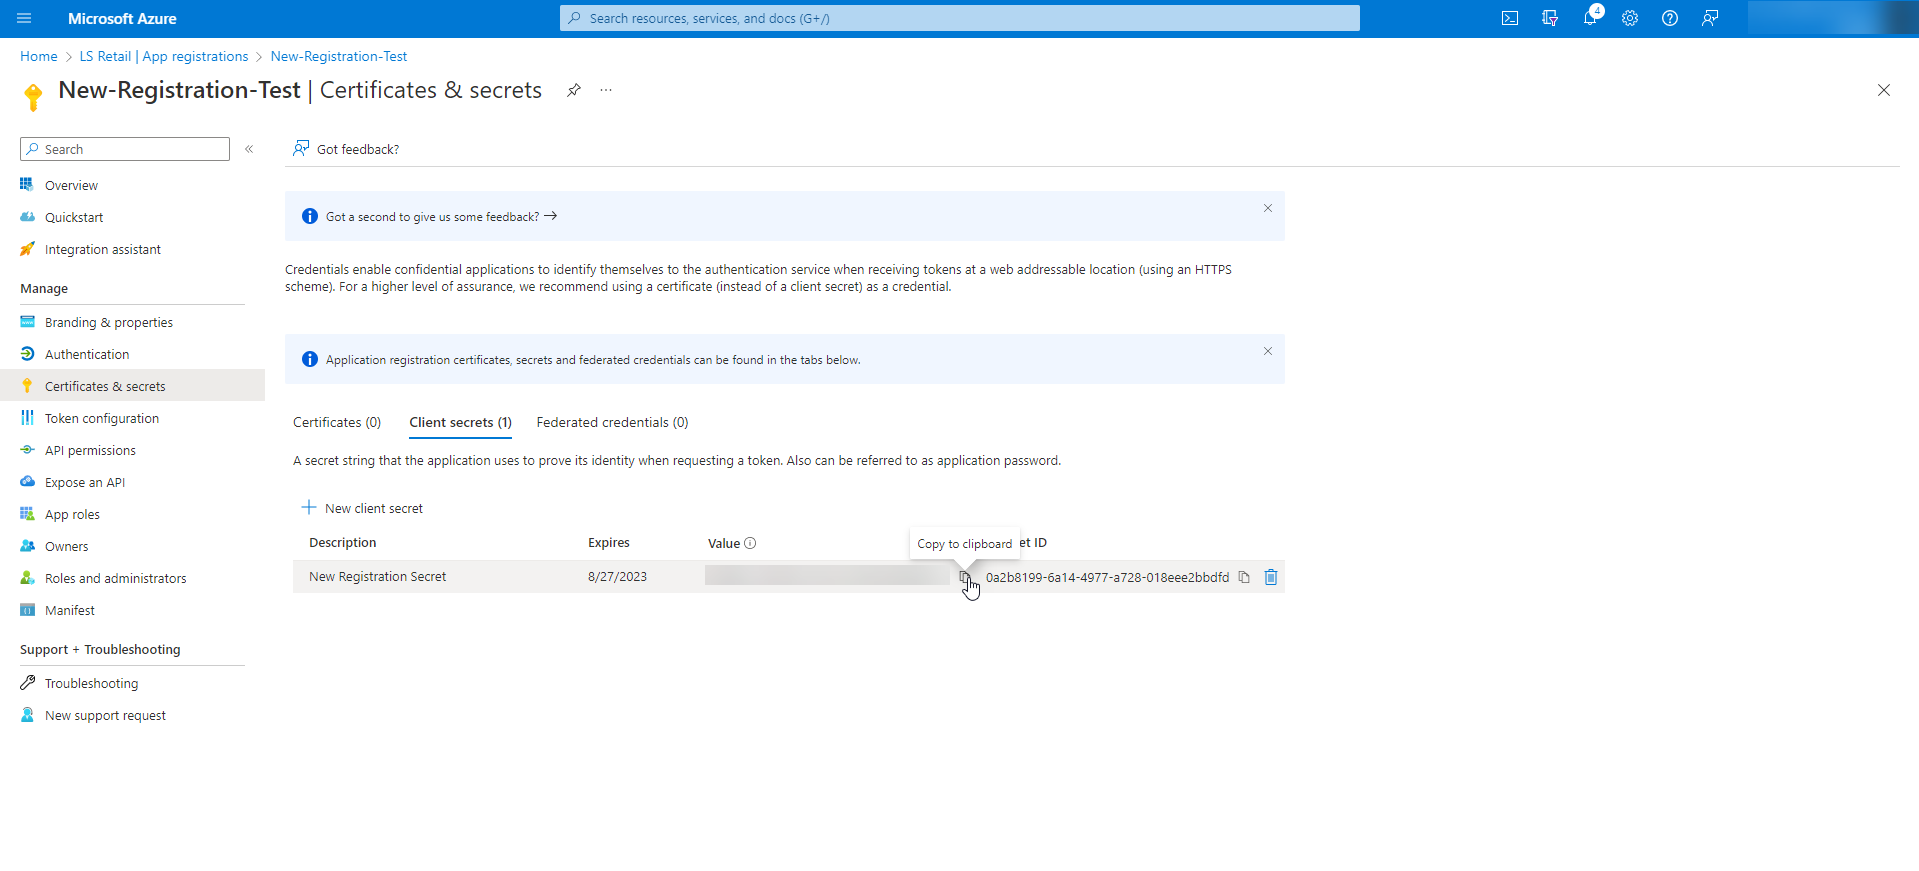
Step 9 - Copy the secret to the clipboard
Copy the client secret generated in the previous step.
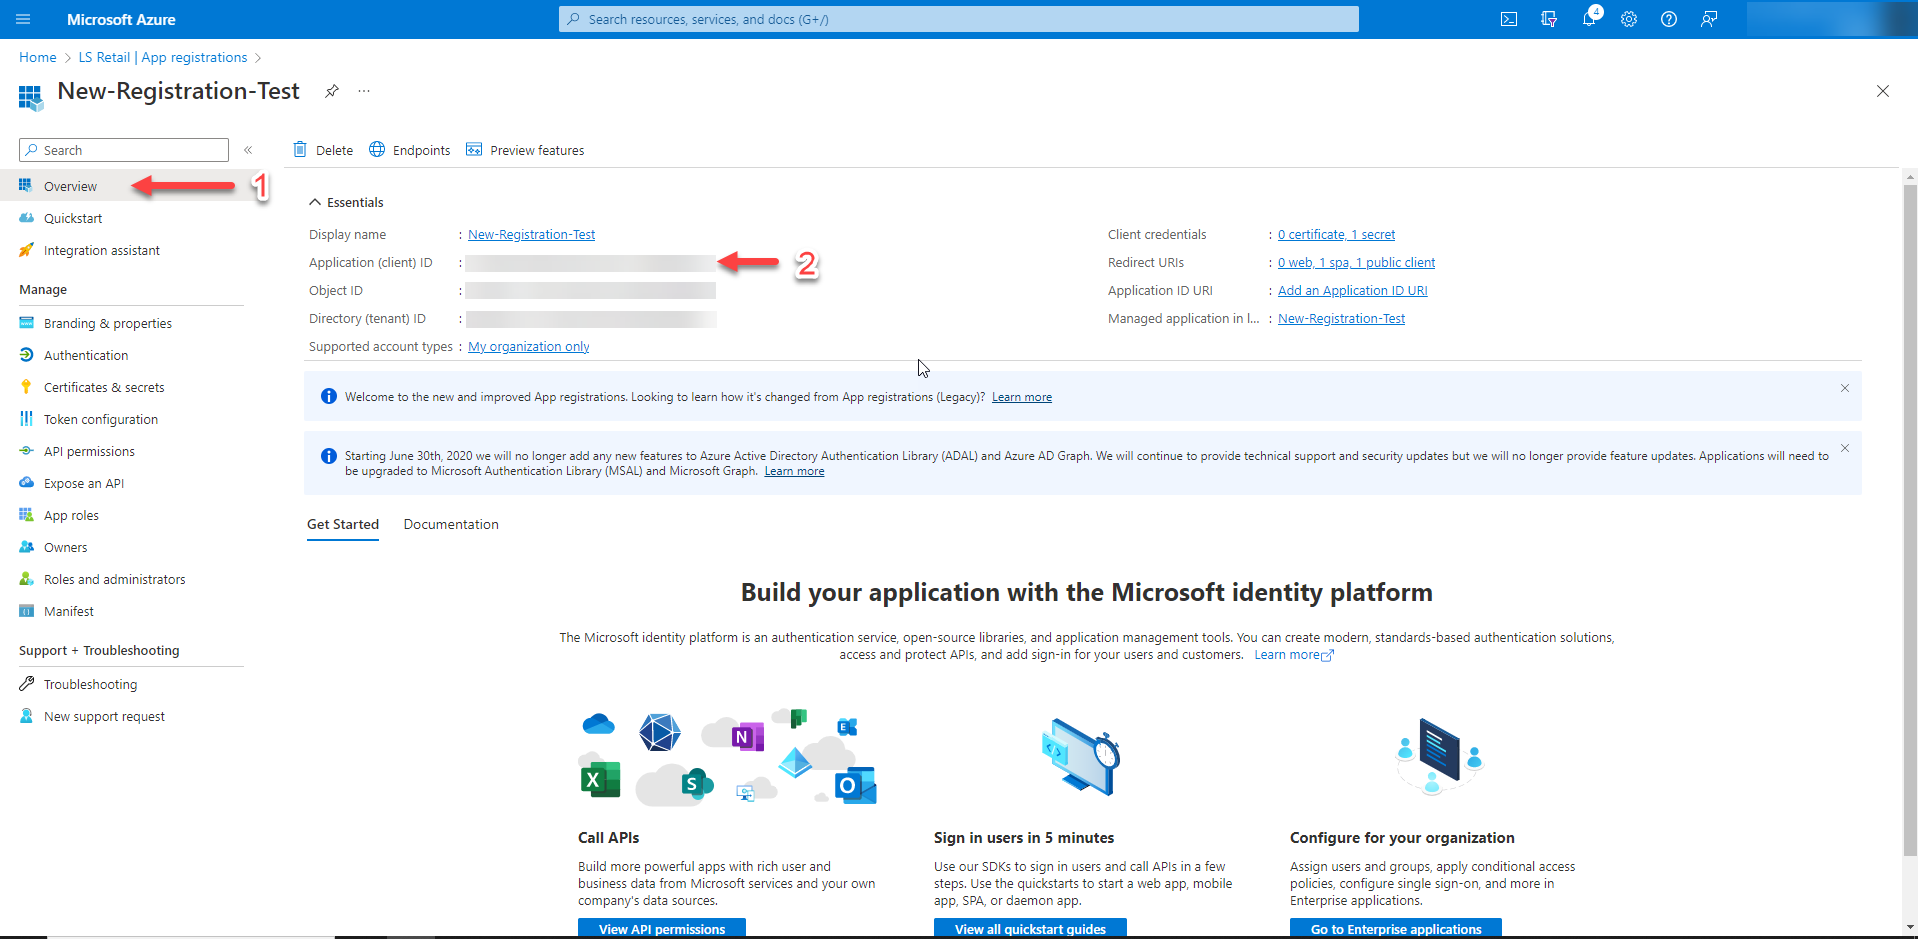
Step 10 - Client ID
To get the client ID, go to the "Overview" section and copy the Application (client) ID GUID.