Azure Storage
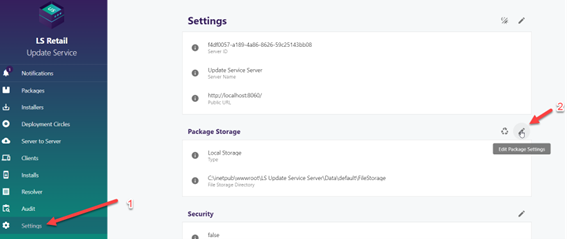
Step 1 - Access Update Service settings
To utilize Azure Storage, navigate to your settings and press the "Edit Package" button.
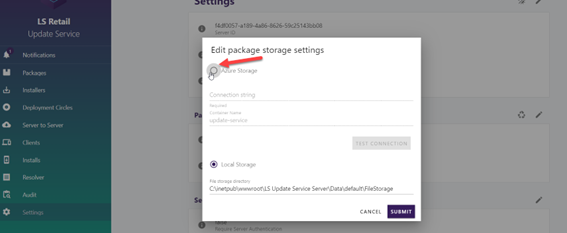
Step 2 - Azure Storage Option
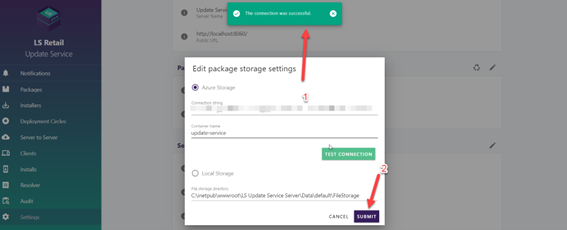
Select the Azure Storage option and input your connection string.
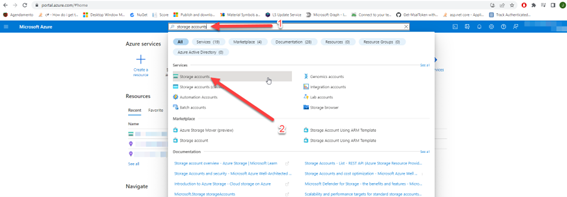
Step 3 - Azure Portal
To obtain your connection string, access the Azure Portal and search for Storage Accounts.
Step 4 - Azure Storage List
Locate and select your Storage Account from the list.

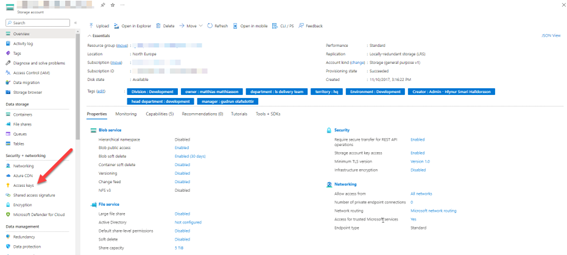
Step 5 - Access Keys
Select "Access Keys" from the side menu.
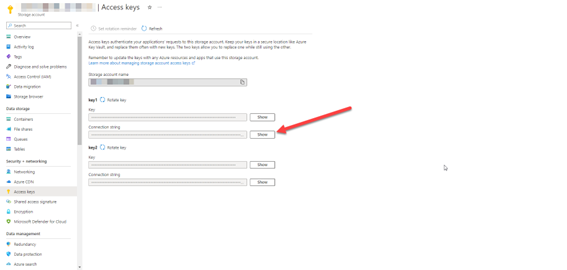
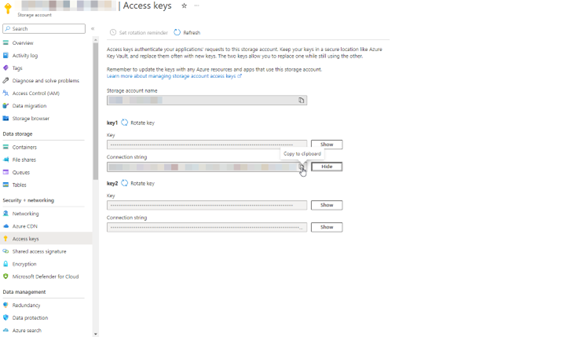
Step 6 - Connection String
Retrieve the connection string by pressing "Show" and copying the string to the Update Service.
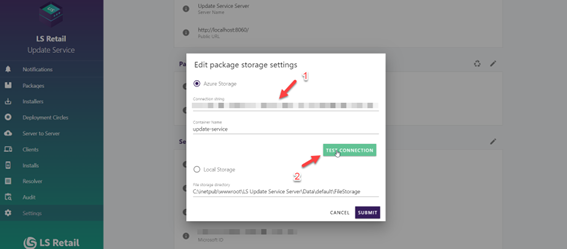
Step 7 - Paste Connection String
Paste the copied connection string into the Update Service and test the connection, then name your container as desired.
Step 8 - Success
Upon successful connection testing, press "Submit".
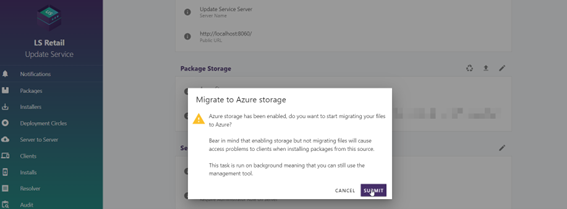
Step 9 - Warning page
Please note that the migration process may take some time, so ensure that you have adequate time available before pressing "Submit".