Azure App Service
Overview
This guide will walk you through deploying an Update Service Server to Azure App Service.
Prerequisites
- Azure App Service
- Azure Blob Storage Account
- Azure SQL Server
Note: Code signing installers are not supported on Azure App Service.
Azure App Service Configuration
This guide does not go through the process of creating an Azure App Service. The following configuration is required for the Update Service Server to run on Azure App Service:
| Configuration | Value |
|---|---|
| Runtime Stack | .NET 7* |
| Operating System | Windows or Linux |
| Publish | Code |
* For v1.1.0, see release notes on what .NET version is required for the latest version.
Download the latest Update Service Server
Before deploying the Update Service Server to Azure App Service, you must first download the latest version of the Update Service Server, which you can do using Update Service cmdlets:
$OutputDir = 'e:\path\to\download\directory'

$Version = Get-UscPackageVersion -PackageId 'ls-update-service-server' -VersionQuery ''

Write-Host "Downloading version $($Version.Version) of ls-update-service-server to $OutputDir"

Get-UscPackageVersionFile -PackageId 'ls-update-service-server' -Version $Version.Version -Download -OutputDir $OutputDir
Deploy to Azure App Service
Before deploying the Update Service Server to Azure App Service, you must first create a zip file of the contents of the site directory from the previous step. You can then use the Publish-AzWebApp cmdlet to deploy the zip file to your Azure App Service.
# ... continue from the previous step

$ResourceGroup = 'my-resource-group'
$AppServiceName = 'my-app-service'

$SiteDir = Join-Path $OutputDir 'ls-update-service-server\site'
$SiteArchivePath = Join-Path $OutputDir 'site.zip'

Add-Type -AssemblyName "System.IO.Compression.FileSystem"
[System.IO.Compression.ZipFile]::CreateFromDirectory($SiteDir, $SiteArchivePath)

Publish-AzWebApp -ResourceGroupName $ResourceGroup -Name $AppServiceName -ArchivePath $SiteArchivePath -Force
You can also use the Azure CLI or other means to deploy the zip file to your Azure App Service.
Create an Azure SQL Database
To create an Azure SQL Database, you must have an Azure SQL Server. Using a SQL user with database creation permissions, you can create a new database with the following PowerShell script:
# ... continue from the previous step

$DatabaseConnectionString = 'Server=tcp:your-sql-server.database.windows.net,1433;Initial Catalog=your-database;Persist Security Info=False;User ID=user-sql-user;Password=your-password;Encrypt=True;'

$ServerExePath = Join-Path $SiteDir 'LSRetail.UpdateService.Server.exe'
& $ServerExePath 'migrate' $DatabaseConnectionString
This will create the necessary tables. You must also configure the connection string in the app settings of your Azure App Service, described in the next section.
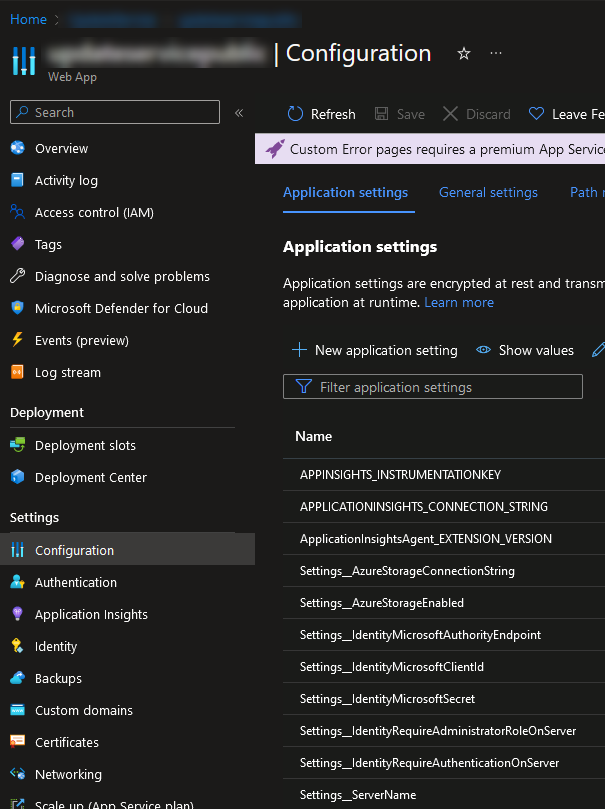
Configure the Update Service Server
When running the Update Service Server on Azure App Service, all settings must be configured under the configuration section of the Azure App Service instead of the settings section on the server UI. See the screenshot below for an example of the settings.
In general, the app service configuration settings reflect the settings in the appsettings.json file, where a settings key in App Service is the same as the properties combined with a __ separator. For example, the Settings->AzureStorageConnectionString property in appsettings.json becomes Settings__AzureStorageConnectionString in the App Service configuration settings.
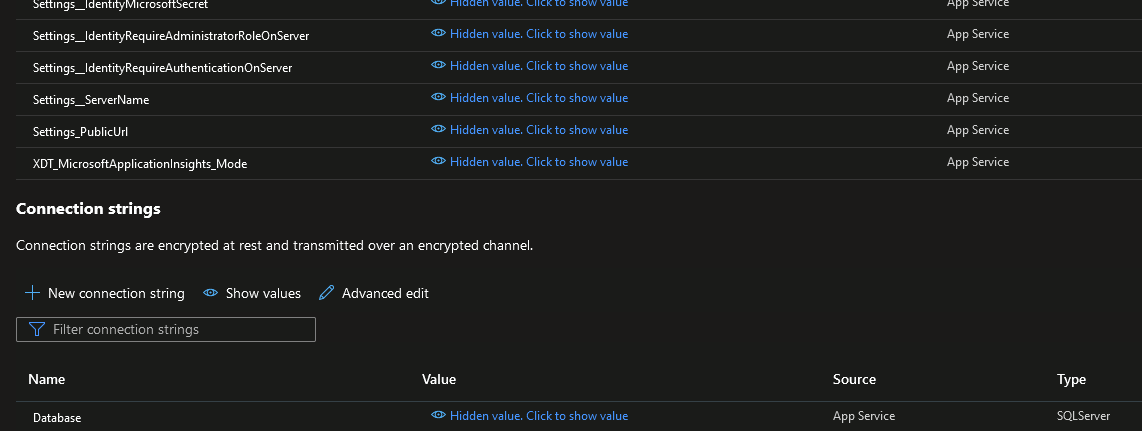
In the Azure App Service configuration section, a database connection string is specified under the Connection strings section. Create a new connection string named Database with the value of the connection string for your Azure SQL Database.
You must set up Azure Storage as file storage when using App Service. For more information, see here.