Server to Server
Overview
Connect this server to remote Update Service servers and download packages from their catalogs. Use server-to-server connections to move packages between environments or locations.
Key tasks
- View and search remote server connections.
- Open a connection to manage it or download packages.
- Add a remote server connection and then open its details.
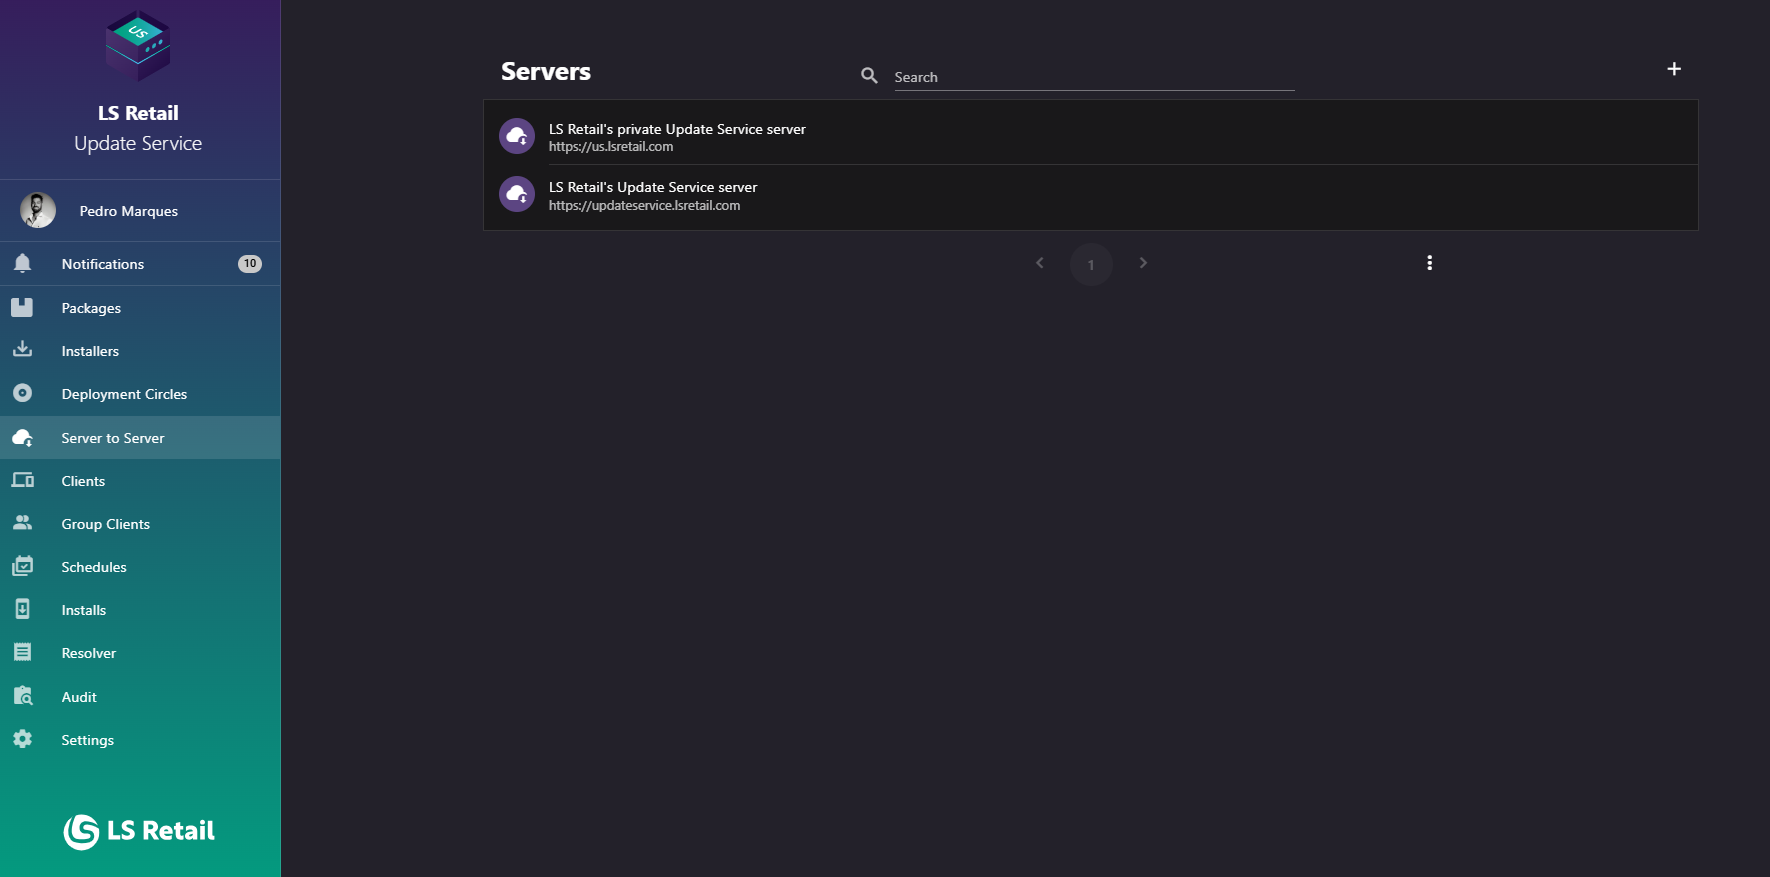
Figure: Server to Server screen.
UI reference
| Element / Field Name | Type | Description & Triggered Action |
|---|---|---|
| Search | Field | Free-text search box (with a search icon) used to filter the server list by name or URL. Supports clearing the search with the built-in clear icon. |
| Add Server | Button | Opens the Add/Edit Server Connection dialog to register a new remote server connection. |
| Server list item | Grid/List Row | Each row displays the server's name (or "Untitled Server" if no name was set) as the title and its URL as the subtitle, with a cloud-download icon. Clicking a row navigates to the Server to Server Detail screen for that connection. |
Add or edit a server connection
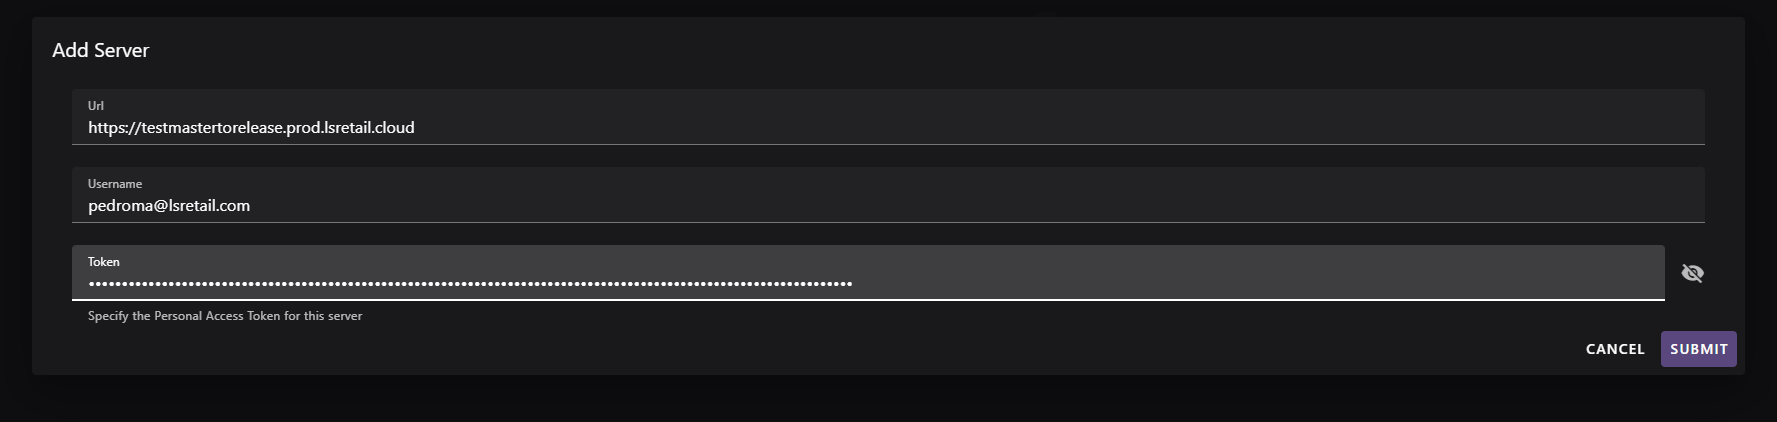
Figure: Interface overview for adding a new server.
Use this dialog to add a remote server connection or update an existing connection. The title is Add Server or Edit Server.
- Specify the URL of the remote Update Service server to connect to. A specific port can be included using the
address:portnotation. This field is required and validated as a well-formed URL. - Optionally specify a Username to authenticate against the remote server.
- Optionally specify a Token (Personal Access Token) to authenticate against the remote server. The token can be shown or hidden using the eye icon.
- Username and Token must be provided together — if one is filled in, the other becomes required; if both are left blank, the connection is treated as unauthenticated.
- Submitting the dialog creates a new server connection, or updates the existing one if editing.
Note
The Token is a Personal Access Token generated on the remote server you are connecting to — not on this one. Sign in to that server and create it as described in the Personal Access Tokens guide, then paste its value here together with the matching Username.
| Element / Field Name | Type | Description & Triggered Action |
|---|---|---|
| URL | Field | The complete address of the remote server to connect to (supports the address:port notation for a specific port). Required; must be a valid URL. |
| Username | Field | The user name used to authenticate with the remote server. Must be filled in together with Token, or left blank if no authentication is used. |
| Token | Field (password) | The Personal Access Token used to authenticate with the remote server. Generate it on the remote server (see Personal Access Tokens). Must be filled in together with Username, or left blank if no authentication is used. Visibility can be toggled with the eye icon. |
| Cancel | Button | Closes the dialog without saving changes. |
| Submit | Button | Saves the server connection (creates it if new, or updates it if editing) and closes the dialog. |