Schedule Detail
Overview
Manage a schedule's name, status, recurring time windows, and associated groups. Each window defines the days and times when deployments and updates can run.
Key tasks
- Edit or delete the schedule.
- Add, edit, or remove time windows.
- Review groups that use the schedule.
Note
If a window ends earlier than it starts, it continues until the end time on the following day.
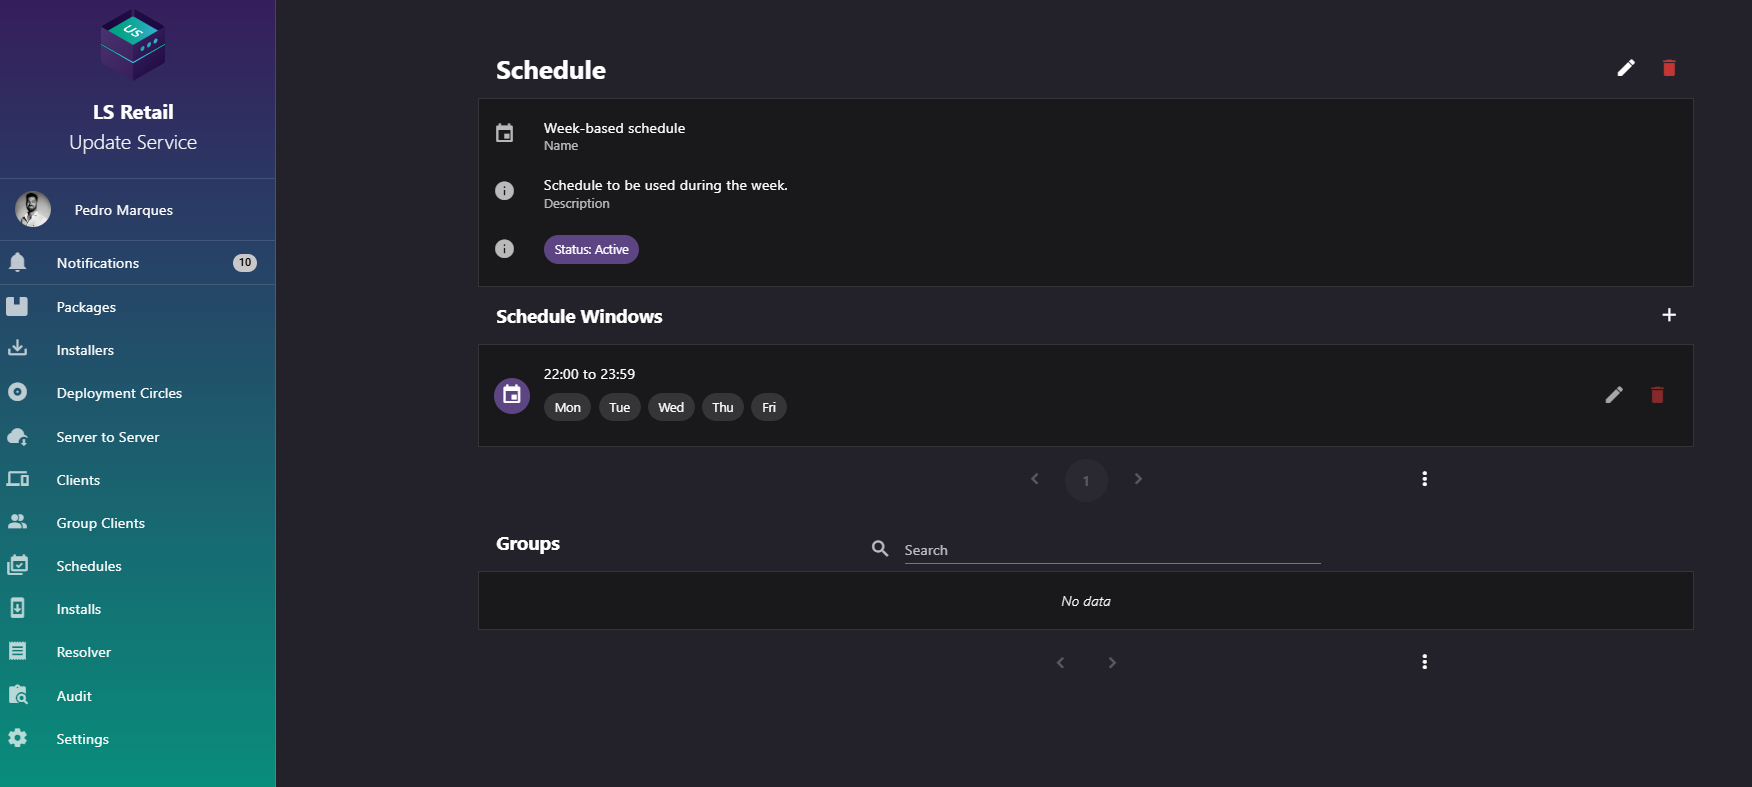
Figure: Schedule Detail screen.
UI reference
| Element / Field Name | Type | Description & Triggered Action |
|---|---|---|
| Edit | Button | Opens the Create/Edit Schedule dialog (see Schedules) pre-filled with this schedule's details. |
| Delete | Button | Prompts for confirmation, then deletes this schedule and returns to the Schedules list. |
| Name | Field (read-only) | The display name of the schedule. |
| Description | Field (read-only) | The description of the schedule. |
| Status | Toggle/Chip (read-only) | Shows "Status: Active" or "Status: Inactive" depending on whether the schedule is enforced. |
Schedule windows
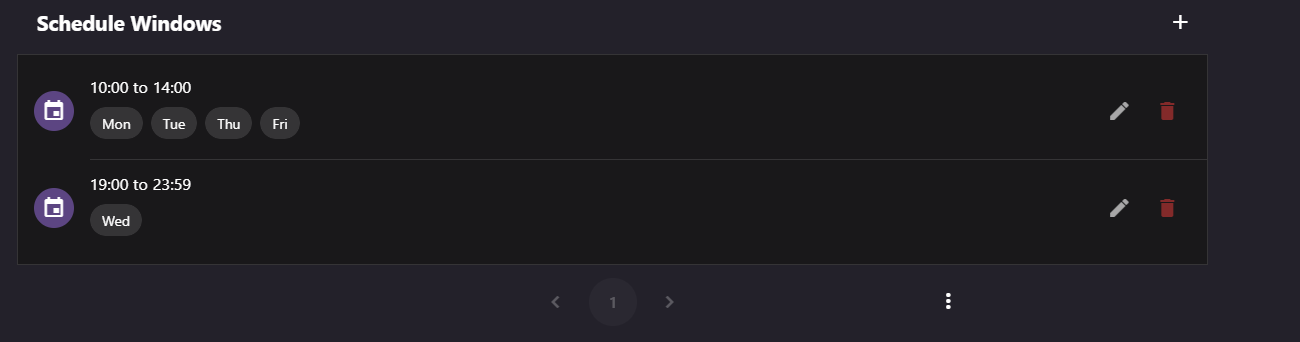
Figure: Interface overview of the Schedule windows screen.
Review and manage the recurring time windows for this schedule.
- View all time windows configured for this schedule, each showing its time range and the weekdays it applies to.
-
- Add a new time window using the Add action, which opens the New/Edit Window dialog.
- Edit an existing time window using the Edit action on that window.
- Remove a time window using the Remove action, after confirmation.
| Element / Field Name | Type | Description & Triggered Action |
|---|---|---|
| Add | Button | Opens the New/Edit Window dialog to create a new time window for this schedule. |
| Window list item | Grid/List Row | Each row shows the window's time range (for example, "08:00 to 17:00", or "20:00 to 06:00 next day" for an overnight window) and chips for each active weekday (Sun–Sat). |
| Edit (window row) | Button | Opens the New/Edit Window dialog pre-filled with this window's start time, end time, and active days. |
| Remove (window row) | Button | Prompts for confirmation, then deletes this time window from the schedule. |
| Overnight window warning | Feedback Message | Shown when a window's end time is earlier than its start time, explaining that the window runs from the start time until the end time on the following day. |
Create or edit a window
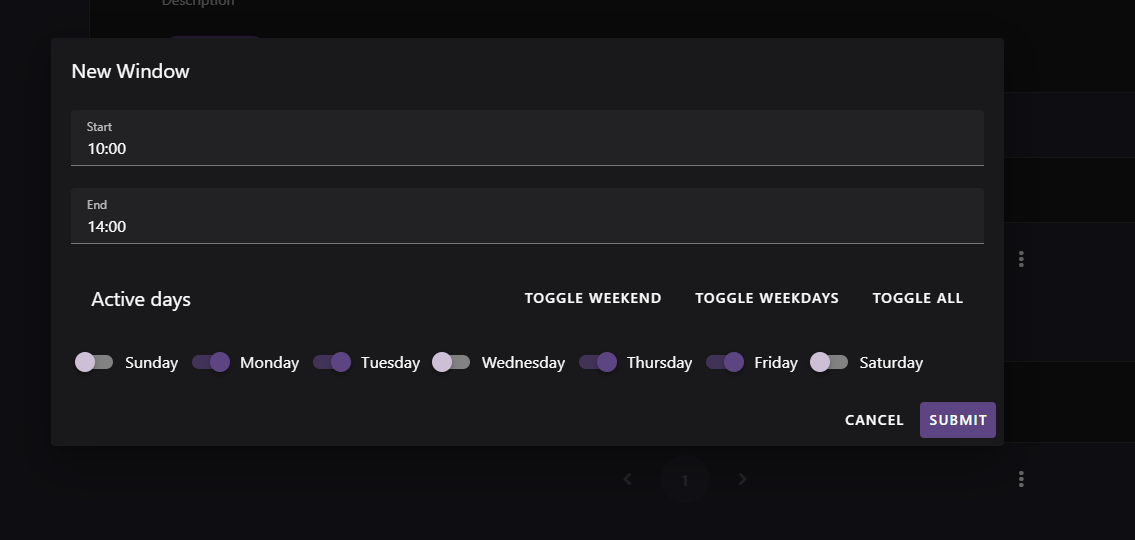
Figure: Interface overview of the Schedule edit screen.
Use this dialog to create a time window or update an existing window. The title is New Window or Edit Window.
- Specify the Start time and End time of the window, in HH:MM format. Both are required and validated as a valid time of day (hours 0–23, minutes 00–59).
- The Start and End time cannot be set to the same value.
-
- Toggle which weekdays the window is active on, individually, using the Active days switches (Sunday through Saturday). New windows start with all days switched off.
- Use Toggle weekend to switch Saturday and Sunday together, Toggle weekdays to switch Monday through Friday together, or Toggle all to switch all seven days at once.
- Submitting the dialog creates a new time window, or updates the existing one if editing.
| Element / Field Name | Type | Description & Triggered Action |
|---|---|---|
| Start | Field (time) | The time of day the window begins, in HH:MM format. Required. |
| End | Field (time) | The time of day the window ends, in HH:MM format. Required. Can be earlier than Start to represent an overnight window. Cannot equal Start. |
| Sunday | Toggle | Activates the window on Sundays. |
| Monday | Toggle | Activates the window on Mondays. |
| Tuesday | Toggle | Activates the window on Tuesdays. |
| Wednesday | Toggle | Activates the window on Wednesdays. |
| Thursday | Toggle | Activates the window on Thursdays. |
| Friday | Toggle | Activates the window on Fridays. |
| Saturday | Toggle | Activates the window on Saturdays. |
| Toggle weekend | Button | Switches Saturday and Sunday together. |
| Toggle weekdays | Button | Switches Monday through Friday together. |
| Toggle all | Button | Switches all seven days together. |
| Cancel | Button | Closes the dialog without saving changes. |
| Submit | Button | Saves the time window (creates it if new, or updates it if editing) and closes the dialog. |
Groups

Figure: Overview of the groups configured to use this schedule.
Shows the groups this schedule is applied to, using the same list as the Group Clients screen. Opening a group from this list navigates to its Group Detail screen.